Wednesday 27 September 2017

Beauty Big Bang Holographic Nails

By now you can tell I am obsessed with chrome and holo powders/pigments 😍
I just cant seem to get enough of them. By the time I think I've got most of the stuff in holo/chrome there comes a whole surge of new products in the market. Just fyi the next on my list is those duochrome flakies without holo. and those shiny new coloured mirror pigments. ooh and I am yet to try those coloured holo pigments and also those peacock holo pigments 😄
somebody stop me!!


Base: Bk water based peel off polish in navy blue
Pigment: Beauty Big Bang Rainbow Holo pigment (sku J2427; link)
Greek Vinyls from Angel Nail Vinyls
Topped with Top pure water based tc from Sparkle & Co


I got this pigment from BeautyBigBang (sku 2427) and I have fallen head over heels in love with holo pigments again. Never was I so happy to see the bright hot sun here in mumbai as I was today.

This pigment is really a very smooth and non-gritty. You just need to rub it on the nails with a silicon applicator or finger tips with light pressure for a couple of times and you will get that super shining smooth holo rainbow. This can be used on gel polish with a no-wipe top coat as well.
The pigment sells for $3.99 for 0.5gm and BeautyBigBang ships even one item free worldwide.
Do use my code "NAAT" for a 10% discount sitewide.
Have a look at the video to see the beauty in action.


PS. Product sent for an honest unbiased review

Monday 25 September 2017

Beauty Big Bang Multichrome Holo Flakies

I am falling and falling hard for these holo/chrome/powder/pigments!
Even in this dull cloudy weather they show a very chromey mirror type shine and it s always a plus when the sun comes out and hits holo 😍


Base: Black Gel polish from Dance Legend
No wipe coat from Dance Legend
Powder: Chameleon Nail Holo Flakes Powder (J2419 in shade 5C)
Accent: thin bow sticker

This is a duochrome flakie in mirror finish with holo pigment (item J2419-5C; link) from Beauty Big Bang website. Yes thats a lot of attributes but those are all the effects you see in this powder. Its not a fine pigment..you can see bit of flakies and powder. The effect is best when you put this on a black base.
But there's 2 ways to put this. On my pointer and pinky finger I have rubbed it in like how you rub in a holo or mirror pigment. This gives a linear holo effect amid shiny flakies. 
The rest of the fingers I have just dabbed it on. Like take a bit on my finger tip and just lightly dabbed on the nail. Repeat till the whole nail is fully covered. This gives a very scattered but strong holo effect with shiny flakies. The pics dont show the true shades..irl the deep pink colour is bright and the holos and flakies just dazzle under direct light.

If you dont want to use gel you can also use a peel off glitter base and a water based top coat.


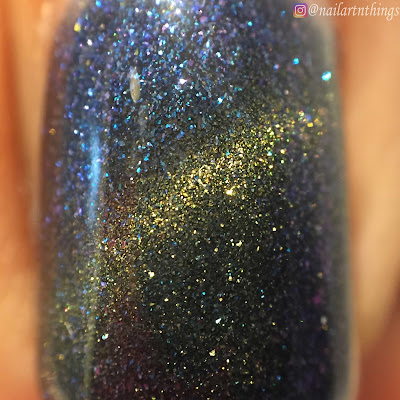
A macro pic (above) to capture the holo (this was rubbed into the nail).


Under a dull sky (above) which shows the duochrome effect of the flakies very clearly.
The powder has a very deep colour shift from pink-purple to green-gold.
It sells for $3.29 for a 0.2gm box. There are 5 shades in this powder with various different combinations of colours and shift.

Macro pic (above) to capture the flakies.

You can buy this at Beauty Big Bang and get a 10% discount if you use my code "NAAT"


PS: Product sent for an honest unbiased review

Sunday 24 September 2017

Born Pretty Store No Wipe Gel Top Coat Review

Recently I started using gel polish just coz I wanted to use those shiny mirror finish pigments and holo pigments. Most of these pigments needed gel polish and a no wipe top coat. I got a basic set of uv gel lamp in a starter kit but I was still short of a no wipe gel topcoat.

And then my favourite shop for all things nail came out with a no wipe tc. Born Pretty Store.


I got the no wipe topcoat (item #39795; link) with some pigments and I am really happy with the way it works esp over these shiny powders and pigments.

Here I have used it over BPS pigment 38616 over a black base and again topped it over the pigment. Can you see how shiny reflects and it certainly doesnt take the shine away from the pigment.


I used it over a glitter gel polish and the result is equally shiny and smooth look.


I have also used it below over the BPS magnetic polish

The top coat goes smoothly and is self levelling. It cures nicely in 30 seconds in a led uv lamp. No need to wipe sticky layer as this is a no-wipe top coat. I love shiny nails using the pigments and chrome/mirror powders so my main purpose to test this was for the powders and it works really well. One layer of top coat and the pigments stick nicely to it and give a proper chrome/mirror finish when rubbed on with finger or silicon applicator. 
It lasted well over 10 days for me without any chips but I removed it as I wanted to change my nail polish. This top coat sells for $2.79 for a 10ml bottle. It is very reasonably priced as compared to other no wipe gel topcoats and is easily available via BPS. If you are a chrome/mirror nails lover and need a good no wipe gel topcoat then this is certainly brings an end to your search.


PS. Product provided for an honest unbiased review.


Friday 22 September 2017

BornPretty Soak Off Caps

Sometimes the glitter polish and gel polish get to you! In the sense they are so tiresome to remove that you dont feel like using them at all. There's always a way to use the peel off base but for me that doesnt work well always. It comes off in just a day or two and most likely in the middle of the important event that I had painted my nails for. So this comes at a really good time for me. 
Born Pretty Soak off caps.


Now I dont fear using gel or glitter polish directly. I love removing them by using these soak off silicon caps (item #39658). I have used the older variety of a small plastic bulb with a rubber cap but trust me these silicone ones are much better and easier to use. 


All you got to do it soak a piece of cotton (1/4th of a cotton pad) in acetone. Place it on your nail so that the polished area is completely covered by it. These caps have a small V opening on the under side. Fold the cap around the edge of the V and place your finger in it. Now unfold the cap around your finger. For glitter polish let it stay for 5 mins. For gel polish let it stay around 10-15 mins. 
Gently remove the cap and voila! your polish should have come out without much trouble.


I got these caps (item 39658; link) from the Bornpretty store. They sell for $2.99 for 5 pieces in a set. You can get them in green, red, yellow, purple, rose-red (bright pink). These are made from silicone material so acetone doesnt affect it and all you need to do is wash off with water once you use them and let dry. 

I find them the best so far to remove polish esp if you use gel. Although I use them to remove any mani even if its a normal one which I think would need a lot of rubbing. I am happy to recommend this product if you dont like the rubbing and tugging one needs to do to remove polish. Any polish!


PS. product sent for an honest unbiased review.

Thursday 21 September 2017

Trendy Floral Nail Art using BeautyBigBang Brushes

These days I am going all the way for making stamping decals. They are fun and creative and the results come out usually very nice. But the down side it is it take s too long with all the stamping and drying and top coating. So I decided to use a cheat way with this mani using these detailed brushes from Beautybigbang website. 

Base: Chambor Gel effect 510
Stamping plate: Moyou Trend Hunter 01 
Accent: Pointer: UCB 5-03 and Pinkie UCB 2-02
Filled in with glass paint in yellow
Stamping polish: Mdu black
Filled in yellow translucent paint on flowers and stripes using Acrylic Nail Liner Brushes (item SKU 1378 from BeautyBigBang; link)
All topped with HKgirl

These brushes retail for $4.44 and they come in a set of 3 brushes with different lengths in colours black, gold and blue. The brushes came packed in a plastic sleeve and each brush is covered with a plastic cap. Each brush is 5mm, 8mm and 1cm in length. 


The brushes are ultra thin with metal handles and very suitable for doing fine lines or free hand and filling in decals with tiny designs.  
The black brush is 5mm and is slightly thicker than the other 2; I filled this nail art using this black brush. The gold brush is 8mm in length and is thinnnest of the three. The blue one is tallest at 1cm and the thickness is right between the other 2.


I love how cute this mani turned out and it got made very soon as filling in with brushes takes much lesser time than making decals. I am not much of a free hand person but the black brush definitely did give a good control and smooth. Look forward to trying more free hand stuff with these brushes.


This is the first time I got items from BeautyBigBang website and they reached me within 4 weeks. These brushes retails for $4.44 and are reasonable for the quality. Items from this website are delivered with free shipping even for a single item. Incase you buy from the site you can use my coupon code NAAT for a 10% sitewide discount on Beautybigbang.


Tuesday 19 September 2017

Aveniro Glass Nail Files

Nail Files are life! I cant do without one!
I always keep one in my purse and couple in the house so if i ever need to trim a crack or splinter before it leads to a dramatic turn I just whip it out. 🤣
Also I have started to appreciate glass nail files. I cant figure why for so many years I havent used them. You really need to try a good glass nail file to appreciate the difference. Earlier I had got some cheap ones and they wore off so pls dont get the ones that come for Rs.30-50/- They will wear off; as in the corrosive texture comes right off in a few uses. So invest some $ and get a good one! they literally last forever! have a look at the review of Aveniro glass files:


They sent me 2 DUO glass nail files: one is medium (90 mm long, 3mm thick, pointed) and one is short (90 mm long, 3mm thick, pointed- easy to be carried for travel purposes)
The big thing is a foot file.


These are their medium (135 mm) and small nail (90mm). Grinding surface has on each side of the file different coarseness, therefore it adapts to the character and quality of the nail. The rougher side is highly abrasive yet gentle to your nails and enables fast and easy shaping of the nail. It is also supposed to file toenails that are harder and their filing is often problematic. The smoother surface serves to final neatening and correction of imperfections.


The foot file is 6mm thick (size 55x110mm) made with 2 different textures.  The coarser side is meant to remove calloused skin and the other smoother side serves to gentle neatening and final smoothening.

The coarse side is visibly different from the smooth side. 
I also used the foot file and it is certainly helpful to maintain smooth skin. Its easy to use and not very abrasive. The result was smooth soft looking skin on my feet which I love. 
coarse side
smooth side
These are my nails after I filed using the medium file. No hangs nails and no rough edges.
These files help for fast and easy filing of nails. Took me 5 mins only to file all nails after I had cut them. The coarse side is also helpful for thick nails esp toes. I just ran them over my nails with the smooth side at last to take of any sharp edges or hang nails. Happy to say these are good quality and live up to my expectations.


Aveniro retails through resellers only.  Aveniro is a manufacturer and wholesale and retail export oriented supplier of glass nail files. The company is located in the North of Czech Republic in the traditional glassmaking region.


PS. Product sent for an honest unbiased review


Advanced stamping Nail art : Roses

These are the longest nails i've had in quite a while. I wanted to do a decal mani before I had to trim them a bit. Love this length but I constantly worry about breaking them or hurting kiddo.

So I made some stamping decals for this. 

Base: Dance Legend Scout
Stamping polish: MDU Pastel Yellow
Stamping plates: BM XL-205 (roses) and BP-L020
Filled roses with DL shock
All topped with HKgirl


This is a beautiful shade! I just looooooove DL polishes!!
Love love love!!! <3 p="">


Sunday 10 September 2017

Indian Stamping Nail Art


Wanted to try some different combi and did this. 

Didnt turn out as I expected. 

Base: OPI Dating a Royal
Stamping Plate: Moyou Arabesque 06
Stampingpolish: MDU Neon yellow and Neon green
Topped with Hkgirl

So I stamped in the middle two fingers with Mdu neon yellow and it didnt show up well so I double stamped it with neon green. Kinda messed up the look a bit. Eh!